After you click Buy Now for a Cross Media Marketing (CMM) campaign, you start the process of ordering the campaign. The steps are as follow:
1. Review the CMM campaign summary and click Begin.
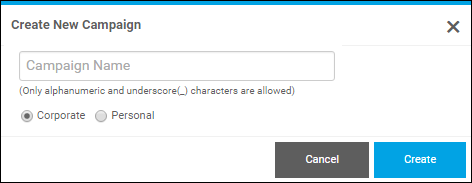
2. Create and name the CMM campaign:
a. In the Create New Campaign window, enter a unique name (without any spaces) for the campaign, for example, JanOffers or FebSale.
b. If given this choice, select Corporate if this is a company campaign (you plan to use company contacts) or Personal if the campaign is for your own contacts.
c. Click Create.
3. Initialize the CMM campaign by specifying the campaign contacts (a list of those the campaign is targeting). To do so, you typically:
● Import contacts.
● Create or edit filters to refine your contact list.
Tip: After you create a campaign and save the campaign contacts you want to use, your work is automatically saved as you complete subsequent steps. If you need to resume the order process later, you can do so from the Campaign Dashboard. (To open the dashboard, click Campaign Dashboard on the account menu.)
4. Customize the campaign media elements, for example, the printed materials, e-mail messages, or personalized web site (PURL) that make up the campaign.
5. Configure the schedule for the activities that make up the CMM campaign.
6. Launch the campaign.
Note: The Initialize through Launch steps must be completed in order.
7. Use the Campaign Dashboard to resume ordering a CMM campaign, track and manage a campaign, and check campaign statistics.