 next to a file and select Move file up
in print order or Move file down
in print order.
next to a file and select Move file up
in print order or Move file down
in print order.Some products like booklets, brochures, or specialized copy jobs require you to supply the content (typically in a PDF file). When you provide the content file for the job and select your print options, you see the effects of your selections immediately. After you are satisfied with your selections, you add the product to the shopping cart.
Notes:
●
If the product is part of a kit, some
fields will not apply and some information may already be filled in for
you. You will also see a Finish
button instead of Add to Cart.
●
At any time you can save your work by clicking Save
at the bottom of the page. This allows you to return to the job later.
1. Click Add Files to supply the content for the job. After you do so, the files are listed under Files, and a preview is automatically displayed on the right.
2. If
you added more than one PDF file, the files are combined into one file
in the order they are listed. This is also the order in which they will
be printed. To change the order of the files, click
next to a file and select Move file up
in print order or Move file down
in print order.
1. In the Job Name field, enter a descriptive name for your customized product so you can identify it easily. (A job is just your customized product. When an order includes several jobs, each is an item in the order.)
2. In the Quantity field, specify the amount you are ordering. The quantity affects the price.
Note: You are warned if the Quantity you enter is invalid. For example, a product may have a maximum order quantity that you exceeded, or you may have entered an invalid multiple for a product that is ordered in multiples.
The Pages field shows the number of pages you are providing (the system calculates this automatically when you add files). This number affects the price.
Note: The options that are available to you depend on the product you selected.
1. In the left-hand pane, click an option, for example, Substrate or Binding and make further selections as necessary. For example, after clicking Binding you need to select a type of binding and possibly a color. Note the following:
● A print option you try to select may be incompatible with a previous selection you made. A message explains which selections are incompatible. For example, you may be prevented from selecting fluorescent pink paper if you selected printing in color. Change your selections as necessary.

● A print option you select may automatically result in another option being enforced. A message explains what is being selected automatically. For example, collation into sets may be enforced.
Note: Sometimes no message is displayed when print options are enforced, but these required print options may affect the price of the job. You will see the required print options in the job summary or pricing summary.

An enforced option may sometimes require further information from you, in which case a red icon at the top of the window alerts you:
![]()
If you move the pointer over the icon, you can see what is required. If you do not notice the alert or you ignore it, you are reminded again when you click Add to Cart, and are prevented from continuing until you provide the required information. For example, you may need to make further selections or provide dimensions.
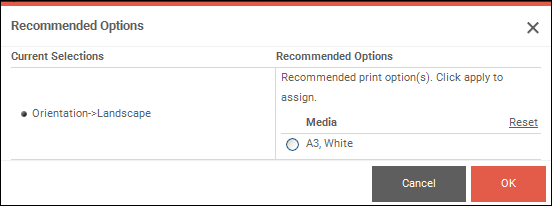
● A print option you select may result in a recommendation for one or more other print options. For example, if you select landscape orientation, a particular substrate may be recommended. (You are not forced to accept the recommendation.)
● Some selections you make may result in recommendations for alternative print options. For example, if you select staples, a coil binding may be recommended as an alternative to staples. You may be offered more than one alternative. If you accept a recommended alternative, your original selection (staples in this example) is removed from the product.

2. For some products a Special Pages option may be available. Click this to indicate that you want certain pages treated differently from the rest of the job. For example, you may want to select a different stock for some pages or print them in color instead of black-and-white.
3. If tabs can be added, insert tabs as necessary.
4. If blank pages can be added, insert blank pages as necessary.
5. If you have the option of providing non-content files, such as a mailing list or instructions, click Upload file(s) and browse to the file you want to provide.
Note: If a preview is not available for the product, you will see a job summary instead.
Display Different Pages
Display different pages by using the navigation buttons:

Alternatively, type a page number in the field that displays the current page number and press Enter.
Switch Between Spread View and Thumbnail View
In spread view, you can see two facing pages at a time; in thumbnail view, you can see small renditions (thumbnail graphics) of several pages at a time. Spread view lets you see more details. Thumbnail view lets you see several pages at a time.
Note: Some products can be viewed just one page at a time; you will not see two facing pages in spread view. Especially for double-sided products in landscape mode, this single-page view makes your selections clearer. If, however, you select a print option like binding, stapling, drilling, or covers for this type of product, two facing pages are displayed.
Use ![]() to switch from spread view to thumbnail view;
use
to switch from spread view to thumbnail view;
use ![]() to switch back to spread view.
to switch back to spread view.
Notes:
●
For single-sided jobs, thumbnail view includes blank back pages and spread
view shows a blank page on the left to represent the back of the previous
page.
●
If you are in thumbnail view, select a page, and then switch to spread
view, the page you selected in thumbnail view continues to be displayed
in spread view.
In spread view, you can do the following:
● Proof pages because you can see more detail.
● Click
 to zoom in or
  to zoom out. To restore the preview
to its default (unzoomed) size, click
to zoom out. To restore the preview
to its default (unzoomed) size, click ![]() .
.
● Right-click a page to display a shortcut menu. (On a mobile device, tap Options.) The commands that are available on the menu depend on the product and the type of content file you supplied – some commands apply only to PDFs, and may not be available for the product you selected. For example, you may be able to insert tabs or blank pages, re-arrange or remove pages, or select different paper for a page.
In thumbnail view, you can do the following:
● Right-click a page to display a shortcut menu. (On a mobile device, tap Options.) The commands that are available on the menu depend on the product and the type of content file you supplied – some commands apply only to PDFs, and may not be available for the product you selected. For example, you may be able to insert tabs or blank pages, re-arrange or remove pages, or select different paper for a page.
● If the product includes tabs, drag a tab before or after a different page.
● If the product allows it, drag a page to a different location to change the order of the pages.
1. To see more pricing details, move the pointer over the Unit Price/Total Price area at the bottom of the window. (This feature is not available in all products.)
2. To see a summary of the job, click Review My Job at the top of the page. The Job Summary window opens and lists information about the job, for example, files, number of pages, quantity, and selected print options.
Note: The pricing summary and job summary may include additional print options required by the Print Shop based on the print options you selected.
1. When you are satisfied with your selections, click Add to Cart.
Note: If the product is part of a kit, a Finish button is displayed instead of Add to Cart. Click Finish to continue with the process of ordering the kit.
2. If prompted, check the preview and the options you selected for accuracy.
3. Proceed with the checkout process when you are ready.
See also
● Inserting blank pages in PDFs
● Re-arranging or removing pages in PDFs
● Customizing a wide format product for which you supply content