In the Import Contacts window, you can import campaign contacts from a CSV file or from an address book. Other contact lists (data sources) may also be available on the site. (The Import Contacts window opens when you click Import Contacts in the My Contacts window while building your campaign.)
The contact list you import is always available; filters let you use a subset of the list for a campaign. You can also do multiple imports. Each import will add contacts to your base contact list.
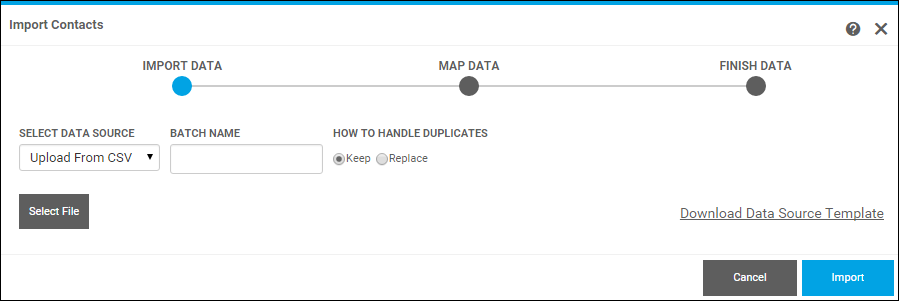
1. If you plan to import contacts from a CSV file and are not sure what kind of data you must supply, click Download Source Template. A file named DSMxContactUpload.csv is saved in your Downloads folder. You can use this file as the basis for your own CSV file.
2. In the BATCH NAME field, enter a descriptive name so you can recognize it when selecting a list/filter for a campaign in the future. (The batch name will serve as the name of both the contact list and the filter.)
3. If you previously imported data, under HOW TO HANDLE DUPLICATES indicate whether you want to Keep duplicates or Replace them with updated information.
4. In the SELECT DATA SOURCE field, choose what you are using for your contact list, for example, Upload from CSV or Address Book.
5. If you selected Upload from CSV:
a. Click Select File.
b. Locate your CSV file.
c. Click Import.
6. If you selected Address Book:
a. Select the check boxes of the addresses you want to use.
b. Click Import.
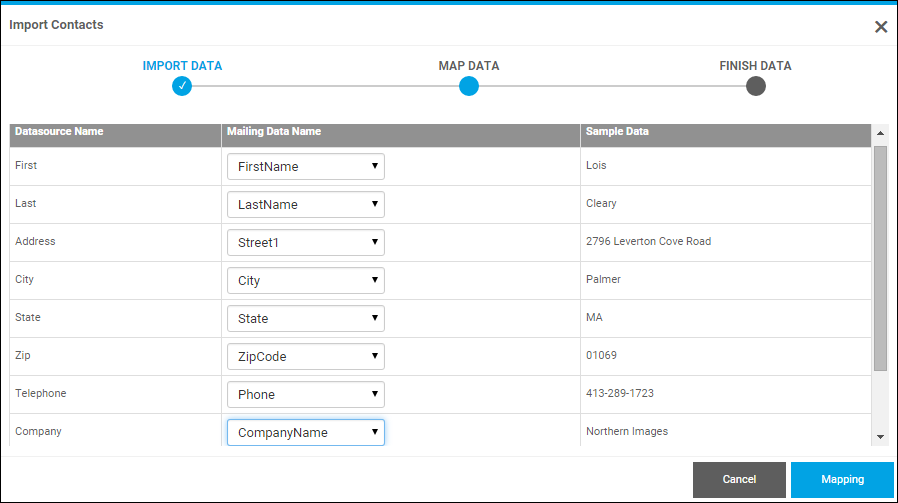
7. After you click Import, map fields in your contact list to fields (name, address, city, and so on) that are required for mailing any printed materials that are part of the CMM campaign. The Datasource Name column lists the names of the fields in your contact list; the Mailing Data Name column lists the names of the fields required to mail printed materials. Select the correct matching fields in the Mailing Data Name column. (Some fields may be matched automatically if their names are similar.)
8. Click Mapping.
9. Click OK when a message confirms the data was imported successfully.
Your imported list is now available for selection in the Choose Filter field in the My Contacts window. Note that the filter name is the same as the Batch Name you provided when importing the list.